Set up the Redirection plugin
For managing redirects on your blog, we recommend using the Redirection plugin. We have listed below the steps for the installation and configuration of the plugin.
Head over to the plugin install page from within your WordPress admin panel and search for redirection in the plugins search box as shown in the image below.

Once installed and activated, the next step is to configure the plugin properly. The settings panel for the redirection plugin can be found under the Tools menu. Your menu might be a bit different from the reference image but that’s because of the installed plugins. No matter what, the link for the Redirection settings panel will always be there.

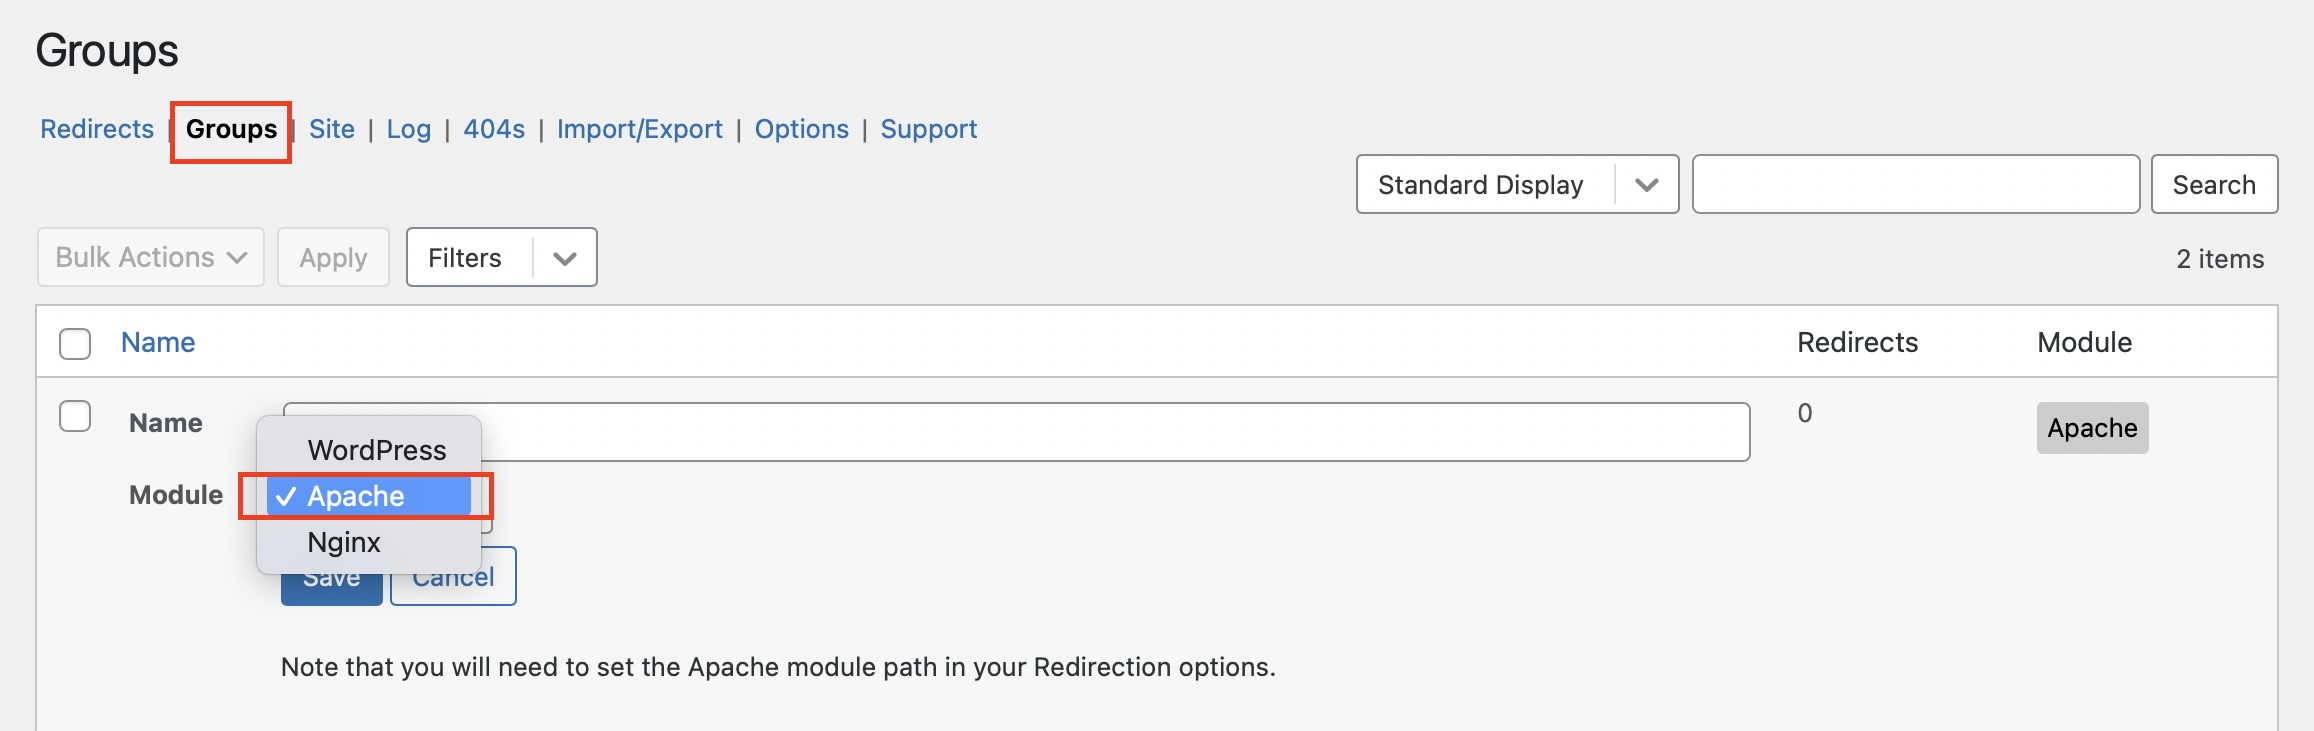
Within the plugin’s settings panel, go to the Groups tab from the top menu and edit the existing group or create a new one to use the Apache Module.
 Then you can click on the Options tab and scroll down to the Apache Module option which by default shows the path that we need for configuring. Note down the path. It will be something similar to this – /var/www/YOUR_DOMAIN_NAME/public_html.
Now, all you need to do is to append /.htaccess at the end of the path which will make the path to something like this – /var/www/YOUR_DOMAIN_NAME/public_html/.htaccess.

Important: Do not forget to replace YOUR_DOMAIN_NAME in the above path with your domain name (and it must not include https and/or www).
And lastly, click on the Update button to save the changes.
Note! URLs ending with .zip .tar .tar.gz .exe .app .rar .mp4 .mov .avi .mpg .mpeg and many others are blocked and as such cannot be redirected either. However, you can create any redirect if the source is /wp-content/uploads. In this case there are a few exceptions. Existing static files or static files that did exist with the following ending: .xml .css .js .jpeg .png .gif .pdf .docx .rtf .odf .zip .rar .ttf .woff2.